I’ve been gardening for a long time. And while I’ve planted my fair share of seeds directly into the garden, I have never really started seeds indoors. Minnesota’s growing season is so short that starting seeds indoors or purchasing seedlings is practically required, otherwise you just won’t make it to harvest before the first frost. Every season I feel like I only have one shot to get it right or it’s back to 6 months of winter. No pressure! So after a humbling discussion with my community garden neighbor and veteran seed starter that went something like this “Oh yes, I start all my plants from seed myself,” he said. “Don’t you?” It was time to learn how to start seeds.
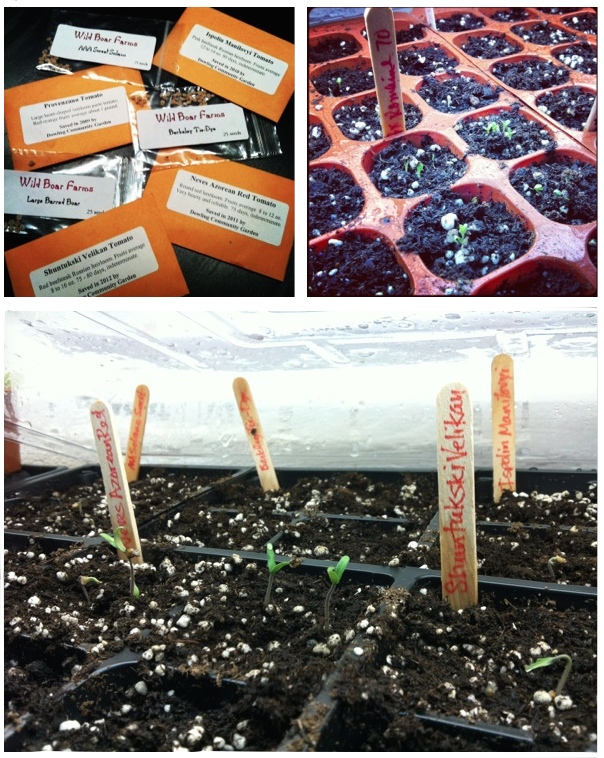
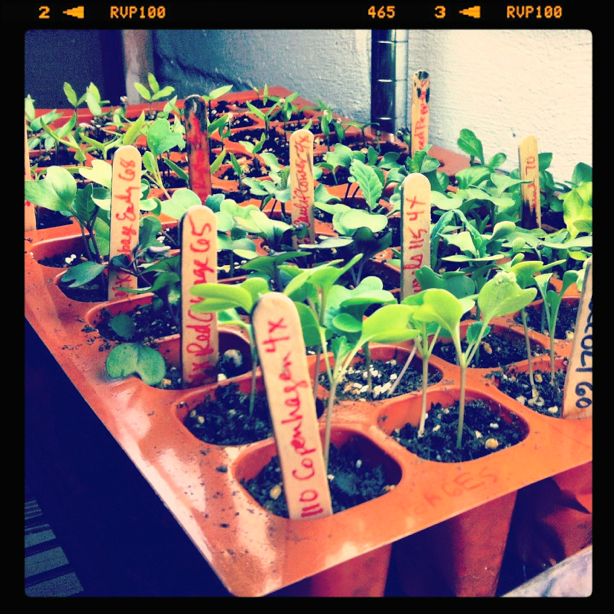
My seed list included cool season crop cabbages, broccoli, cauliflower, Brussels sprouts, head lettuces, and warm season veggies eggplant, tomatoes and hot and sweet peppers. The seed starting supplies and equipment included 36 cell and 4 cell seedling trays, tray covers, seed starting mix, watering trays, tray risers, a water mat, a warming mat, a two bulb fluorescent shop light with a warm and cool bulb and popsicle stick markers.
I started my cool season crops as well as my eggplants and peppers on March 1st. The cool season plants need to be planted 6-8 weeks before the soil can be worked in the spring, which can be before the last frost. Eggplant and peppers are extremely slow growers and they need up to 10 weeks to get to a decent size. My tomato plants went in two weeks later. Check with your local university extension office or gardening club for the average last frost date and recommendations for the best time to start seeds. Then compare that with the suggested seeding time on the back of the seed package. Cool season crops go in up to a month prior to the last frost. Warm season crops can go in the ground a few weeks after the last frost when the soil is warm. And remember that many cool season seedlings can also be planted in the ground in late July for a fall harvest. Yep, even in Minnesota we can jam in two rounds of crops. Cool season veggies and tomatoes are the easiest seeds to start indoors, so if this is your first time, try those for starters.
After you’ve chosen your seeds and set your calendar, set up your seed starting area. I used open wire shelving with the adjustable shop light hanging above and the cells, trays and warming mat below. I plug the light into a timer and set it to 16 hours a day light and 8 hours dark. Plants need a dark period to properly process nutrients in their leaves. Keep the light about 1 inch above the plants, adjusting it up as they grow.
Now it’s time to watch them grow and wait for the weather to turn from winter to spring. My cool crops and tomatoes took off like a shot and grew quite well. The peppers and eggplant went very slowly, but they kept coming. Keep them watered but not soaking. It’s OK if they dry a little, but you don’t want them bone dry or the fine roots will die back. If your seedlings are looking a little leggy, try adding a very gentle fan to the room to give them some air circulation. This will simulate an outside environment and cause the plant to grow a stouter stem. Watch the water level, though, as this does cause some drying.
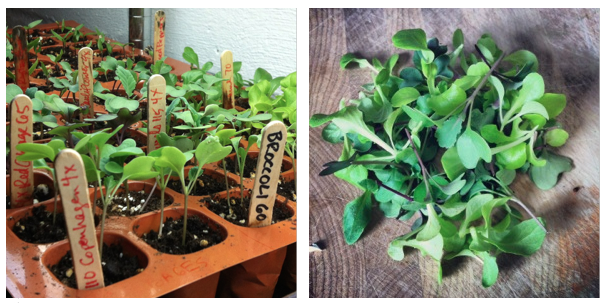
Once all the plants have two true leaves (not the first pair up, those are your sprouting leaves), it’s time to thin. Crowding is very bad at this stage. They need all the light and room they can get. Fortunately, all the cole and lettuce crop thinnings are edible! Mine went on top of an omelette.
About 2 weeks before you want to plant your seedlings into the garden, it’s time to harden them off. This has been the most daunting part of my journey. I was super worried about killing my plants! And, due to circumstances beyond my control (SNOW), I did loose a couple of seedlings. Not sure why, but they just didn’t like the conditions. (I suspect seasonal affective disorder.)
I made a poor-mans cold frame out of a plastic storage container to harden off my plants. The reason for a cold frame is that it exposes the plants to the outdoor temps, but keeps the wind, direct sun and harsher elements at bay, letting the plants acclimate. Because of some terrible spring weather here in Minnesota (aka SNOW until May 2nd), I took the extra step of adding “thermal mass” to my cold frames with jugs of water. The water heats up during the day, then releases heat at night, tempering the overnight temperatures for the plants. During the day if it’s sunny you want to prop open the lid of the cold frame to allow air circulation and to prevent over heating. At night or during foul weather you close the lid. During the last week I started leaving the lid propped open at night, too, then totally off. Just go slowly so you’re plants have time to adjust.
If you don’t have access to a cold frame, just take your plants out in to a sheltered, semi-shady spot for a few hours at a time. Slowly lengthen their outings and increase their sun exposure. Over two weeks time, they should be able to be out for 24 hours. If frost is coming, bring them to a cool spot inside, like into a garage. Cool season crops can bolt if they jump in and out of warm and cold environments to often.
Finally, after acclimating, it’s time to plant in the garden. Pick a cloudy, cool day with little to no wind. Water well and cross your fingers. If you’re still worried, cover your plants with floating row cover, particularly if frosty weather or a hard freeze is on the way. Even cold weather crops don’t love the cold that much. And breath! This is suppose to be fun, right?